
A loose cabinet handle, a drafty door, or a shelf that needs installing can seem like a quick weekend fix. Then you walk into the hardware store and face three aisles of drills, dozens of screwdriver sets, and a bright yellow sale sign promising a deal you supposedly can’t miss.
Suddenly, your inexpensive home improvement project doesn’t look so inexpensive.
The challenge isn’t finding tools. It’s knowing which ones are worth buying, which can wait, and when paying less today could cost you more tomorrow.
If you’ve been searching for Tools Tips and Deals on Home Upgrade, this guide is designed to make those decisions easier. Whether you’ve just bought your first house or you’re improving a home you’ve lived in for years, you can get more done without filling your garage with expensive equipment you’ll rarely use.
Quick Answer
The smartest way to save on home upgrades is to buy versatile hand tools, consider a reliable drill/driver, and invest in appropriate safety gear before purchasing specialized equipment. Match each tool to your actual projects, compare buying with borrowing or renting, and check total costs rather than advertised discounts. Handle manageable DIY improvements yourself and leave high-risk work to qualified professionals.
Why the Right Tools Matter More Than the Most Expensive Tools
An expensive tool isn’t automatically the best tool for your house.
A professional contractor might use a heavy-duty rotary hammer every week. A homeowner hanging two pictures and assembling a bookcase probably won’t need one at all.
The difference comes down to three things: what you’re working on, how often you’ll use the tool, and how demanding the job will be.
Consider installing curtain rods. You might need a tape measure, level, drill/driver, appropriate bits, and suitable wall anchors. Buying a premium collection of specialty power tools won’t make that project noticeably easier.
On the other hand, a weak drill that struggles with your home’s wall materials can waste time and damage fasteners.
Here’s a better approach:
- For occasional repairs: Focus on basic, dependable tools that work across multiple tasks.
- For frequent DIY projects: Consider better ergonomics, durability, and battery compatibility.
- For specialized jobs: Investigate rentals before purchasing equipment you’ll rarely need.
- For high-risk work: Consider whether professional labor is the safer and more economical investment.
The goal isn’t to own the biggest toolbox in the neighborhood. It’s to have the right equipment ready when something needs fixing.
Essential Tools for Home Upgrades
Must-Have Hand Tools for Everyday Repairs
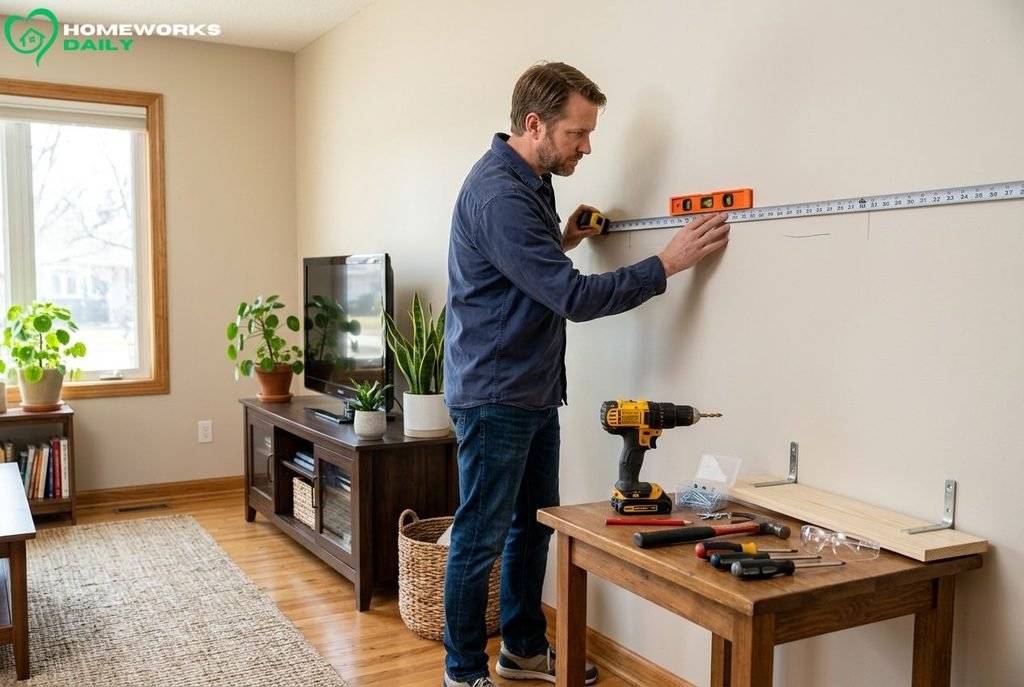
For most new homeowners, a small collection of hand tools delivers more immediate value than an expensive power-tool bundle.
Start with these essentials:
- 25-foot tape measure: Useful for furniture layouts, shelving, door openings, and materials.
- Claw hammer: Handles light fastening and nail removal.
- Multi-bit screwdriver: Covers common household screw types without requiring a large collection.
- Adjustable wrench and pliers: Helpful for assembling furniture, tightening hardware, and gripping small components.
- Torpedo or 24-inch level: Keeps shelves, brackets, and hardware properly aligned.
- Retractable utility knife: Cuts cardboard, packaging, and suitable lightweight materials.
- Putty knife: Useful for small wall repairs, patching, and scraping appropriate surfaces.
- Hex-key set: Handy for furniture assembly and common hardware adjustments.
Choose tools with comfortable grips and sturdy construction. A screwdriver that fits fasteners properly is worth more than a large assortment of poorly fitting bits.
Beginner buying tip: If your budget is limited, purchase the hand tools you’ll need for your next two or three projects first. Add the rest as real needs appear.
Power Tools Worth Considering
A cordless drill/driver is often the most useful first power tool for a homeowner.
It can drill pilot holes, drive screws, assemble furniture, and install hardware. Look for variable speed, an adjustable clutch that helps control screw-driving torque, and a comfortable weight.
A compact 12-volt drill can handle many light household tasks. An 18-volt or 20V Max model may offer more versatility for demanding work, but those labels don’t tell the whole story. Compare manufacturer specifications, torque control, battery capacity, and the materials you’ll work with.
Other power tools can wait until you need them:
- Impact driver: Particularly useful for frequent screw-driving and larger fasteners.
- Random-orbit sander: Helpful for suitable woodworking and furniture refinishing projects.
- Circular saw: Worth considering for repeated lumber-cutting projects, provided you have the training and safe work setup.
- Oscillating multi-tool: Useful for certain trim, flooring, and repair tasks that require controlled cuts in awkward spaces.
You don’t need to buy all four at once.
Safety Gear and Helpful Accessories
A bargain drill is no bargain if you don’t have the right protective equipment.
Keep suitable safety glasses, hearing protection, task-appropriate gloves, and respiratory protection available. Select protection according to the actual hazard and manufacturer instructions; ordinary dust masks aren’t suitable for every type of dust or chemical exposure.
You’ll also benefit from a few inexpensive accessories: painter’s tape, clamps, a flashlight, a small organizer, and appropriate drill bits.
Remember that older homes deserve additional caution. The EPA’s guidance for DIY renovations warns that disturbing painted surfaces in homes built before 1978 can create hazardous lead dust. EPA recommends hiring a lead-safe certified contractor for renovation work in these homes.
Smart Tool Tips That Save Time and Money
Buying wisely is only half the equation. How you use, maintain, and organize your equipment also affects what each project costs.
Measure the Job Before Choosing the Tool
Suppose you’re mounting a storage shelf in your laundry room.
Before buying hardware, find out whether the wall is drywall over wood studs, masonry, or another construction type. Confirm the shelf’s dimensions, intended load, and manufacturer’s mounting requirements.
A stud finder can help locate framing, but it doesn’t guarantee that a wall is free of electrical wiring or plumbing.
This small planning step prevents the familiar problem of coming home with screws, anchors, or drill bits that don’t suit the surface.
Choose a Cordless Battery System Carefully
Cordless tools are convenient, but their batteries can become a hidden expense.
Different brands—and sometimes different product lines within a brand—use incompatible batteries and chargers.
If you expect to buy several cordless tools over time, choosing a suitable battery platform can simplify future purchases. Bare tools, which are sold without batteries or chargers, may then become practical options.
However, don’t stay loyal to one brand if its available tools don’t meet your needs.
A useful rule: Compare the cost of the complete working setup, not just the tool body.
Maintain What You Already Own
You can extend the useful life of many tools with basic care.
- Clean dust and debris after each job.
- Inspect cords, guards, switches, and accessories for damage.
- Replace worn or damaged bits and blades.
- Follow manufacturer instructions for battery storage and charging.
- Keep tools dry and protected from extreme temperatures.
- Store small accessories in labeled compartments.
Before buying another tool, check your toolbox. Duplicate purchases are surprisingly easy when drill bits, sockets, and screwdriver attachments end up scattered across different drawers.
How to Find Tool Deals Without Wasting Money
A good deal reduces the cost of something useful. A bad deal convinces you to buy something you didn’t need.
That distinction matters more than a dramatic discount percentage.
Compare Total Ownership Costs, Not Just Sticker Prices
Imagine finding a discounted cordless drill.
Before buying, check whether the package includes a battery, charger, case, and useful accessories. Some listings offer a complete kit, while others include only the tool.
Your real cost may include:
Tool + batteries + charger + required accessories + tax + delivery + future replacement costs
Also consider storage space, maintenance, and warranty support.
A lower-priced tool with difficult-to-find replacement parts may be less economical than a better-supported option.
How Can You Recognize a Genuine Tool Discount?

Start by comparing the same model number across established retailers.
Tools that look nearly identical may come with different batteries, specifications, included accessories, or warranty terms.
Before making a purchase:
- Compare identical model numbers and package contents.
- Check prices at more than one reputable retailer.
- Review recent price history when reliable tracking data is available.
- Calculate shipping, taxes, and any required accessories.
- Read return conditions, particularly for clearance, refurbished, and open-box items.
Seasonal promotions around Memorial Day, Labor Day, Black Friday, and other retail events may offer worthwhile opportunities. But a seasonal sales label isn’t proof that the price is unusually low.
A discounted tool is only a good purchase if it does the job you need at a competitive total cost.
When Should You Buy Instead of Rent a Tool?

Buy tools you’ll use repeatedly. Rent specialized equipment for occasional projects when rental costs, availability, and transportation make sense.
A drill/driver used for repairs throughout the year is a reasonable ownership candidate.
A floor sander needed for one major project is different. Renting may give you access to suitable equipment without paying for long-term storage and maintenance.
Here’s a simple hypothetical comparison—not a current retailer quotation.
Suppose purchasing a specialty tool and its necessary accessories costs $200, while renting it costs $60 per day.
- One rental day costs $60.
- Three rental days cost $180.
- Four rental days cost $240.
Buying begins to look more competitive around the fourth use-day, before accounting for rental fees, transportation, maintenance, storage, resale value, and other differences.
The actual break-even point depends on your local prices and rental conditions.
Borrowing may be an even better choice for an occasional job, provided the tool is appropriate, in safe working condition, and used according to its instructions.
What Should You Check Before Buying Discounted Tools?
A bargain deserves a closer look when it’s refurbished, open-box, discontinued, or sold by an unfamiliar seller.
Check the product’s condition, model number, replacement-part availability, return policy, and warranty eligibility. Manufacturer warranties may differ between new, refurbished, and third-party marketplace purchases.
For used cordless equipment, examine battery and charger condition carefully. Don’t use damaged, swollen, modified, or incompatible battery packs.
Finally, search the U.S. Consumer Product Safety Commission’s recall database for the model. Recalled products can sometimes appear in secondhand listings, and a low price doesn’t make them safe.
Home Upgrade Tools Comparison Table
Not every homeowner needs the same equipment. This comparison helps match common tool categories to realistic uses.
| Tool or category | Best use | Ideal buyer | Buy or rent? | Money-saving consideration |
| Basic hand-tool kit | Small repairs and furniture assembly | Almost every homeowner | Buy | Start with useful individual tools or a compact quality kit |
| Cordless drill/driver | Hardware, pilot holes, and fastening | Beginners and frequent DIYers | Usually buy | Compare complete kits and battery systems |
| Stud finder and level | Mounting shelves and wall fixtures | Homeowners installing hardware | Usually buy | Verify wall conditions; don’t rely on a stud finder alone |
| Random-orbit sander | Appropriate woodworking and finishing | Occasional furniture DIYers | Depends on use | Budget for abrasives, dust control, and protection |
| Circular saw | Repeated lumber cutting | Experienced, appropriately trained DIYers | Buy or rent | Consider safe setup, blade costs, and store cutting services |
| Floor sander | Suitable wood-floor refinishing | Homeowners tackling a substantial one-time job | Usually rent or hire a pro | Account for dust control, preparation, and finish application |
| Large demolition equipment | Specialized demolition or removal | Experienced users and contractors | Usually rent or hire a pro | Training, transport, structural risks, and disposal may dominate costs |
The cheapest approach may be to have lumber cut to size at a retailer, borrow a tool, or pay for a small amount of professional labor rather than purchasing an expensive machine.
Affordable Home Upgrade Projects Worth Considering
The right DIY project improves comfort, appearance, or function without creating unreasonable safety risks.
Here are six possibilities that don’t require a garage full of equipment.
1. Refresh Caulking Around a Bathtub or Sink
Skill level: Beginner to intermediate, depending on the existing damage.
Tools: Utility knife or suitable caulk-removal tool, caulk gun, cleaning supplies, and manufacturer-recommended sealant.
Worn caulk can make an otherwise clean bathroom look neglected. Replacing failed caulk may also help limit water intrusion at appropriate joints.
Remove the old material carefully, clean and dry the surface, and follow the sealant’s application and cure instructions.
Watch out for: Applying fresh caulk over damp, moldy, or damaged material. Persistent moisture or soft wall surfaces may indicate a problem that needs professional attention.
2. Weatherstrip Drafty Doors and Windows
Skill level: Beginner for accessible, simple installations.
Tools: Tape measure, scissors or utility knife, cleaning supplies, and appropriate weatherstripping.
Drafty doors can make rooms uncomfortable even when the heating or cooling system works properly.
Measure the gaps, select weatherstripping designed for the application, and check that doors and windows still close and operate safely.
ENERGY STAR’s guidance on sealing and insulating identifies weatherstripping and caulking as practical measures for addressing suitable air leaks.
However, don’t seal required ventilation openings or ignore moisture and combustion-safety concerns.
If the problem involves damaged window hardware, failed glazing, or replacement decisions, HomeWorks Daily’s guide to casement windows and buying considerations can help explain the broader options.
3. Replace Cabinet Knobs and Drawer Pulls
Skill level: Beginner.
Tools: Screwdriver, tape measure, and possibly a drill with a suitable bit.
New cabinet hardware can refresh a kitchen or bathroom without replacing the cabinets.
For the simplest installation, choose replacement pulls with the same hole spacing as the originals. Measure from the center of one mounting hole to the center of the other.
Common mistake: Buying attractive handles before checking the spacing or screw length.
A small measurement error can mean drilling unnecessary holes or returning an entire package of hardware.
4. Install Practical Storage Shelves
Skill level: Beginner to intermediate.
Tools: Tape measure, level, drill/driver, appropriate bits, and mounting hardware rated for the wall and expected load.
A well-positioned shelf can make a laundry room, closet, or garage more functional.
Plan what you’ll store, then select brackets and mounting methods suitable for the weight and wall construction.
Safety consideration: Heavy loads need appropriate structural support. Locate framing carefully, investigate potential hidden utilities, and follow the shelf manufacturer’s instructions. When conditions are uncertain, have a qualified installer assess the wall.
5. Protect Existing Hardwood Floors
Skill level: Beginner.
Tools: Microfiber mop, compatible floor cleaner, felt furniture pads, and a suitable vacuum attachment.
Not every home upgrade involves construction.
Adding furniture protectors, improving entryway dirt control, and using the correct cleaning equipment can help preserve an existing floor.
Avoid assuming that a stronger cleaner or steam mop will improve the result. Floor finishes have different care requirements.
For product-selection guidance, see HomeWorks Daily’s advice on cleaning hardwood floors without damage.
Professional refinishing is a separate decision, especially when floors are deeply damaged or have limited remaining finish thickness.
6. Build a Simple Raised Garden Bed

Skill level: Beginner to intermediate.
Tools: Tape measure, level, drill/driver, suitable saw or pre-cut lumber, and appropriate fasteners.
A raised bed can make a backyard more organized and provide a defined gardening space.
But the lumber isn’t necessarily the biggest planning challenge.
Soil volume, drainage, access, sun exposure, and the condition of the underlying ground all affect the finished project.
If you want a detailed starting point, HomeWorks Daily’s step-by-step guide to building a raised garden bed covers planning and construction considerations.
Avoid this mistake: Building the frame before calculating how much soil you’ll need. For digging or excavation, check for underground utilities before disturbing the ground.
Common Tool-Buying Mistakes and How to Avoid Them
Even experienced DIY enthusiasts can end up with equipment that gathers dust.
A few purchasing habits help prevent that.
Buying a large kit because it appears to offer more value. A bundle might contain several useful tools, but it might also include equipment you’ll rarely touch. Price the items you’ll actually use before judging the savings.
Ignoring consumables. Sandpaper, saw blades, drill bits, fasteners, and protective materials can add substantially to project costs. Put them in your estimate from the beginning.
Choosing the lowest price regardless of quality. Inexpensive equipment can be perfectly adequate for light work. But poor control, unsuitable specifications, or unreliable parts can make certain jobs frustrating or unsafe.
Overestimating your available time. A project that seems inexpensive on paper may require multiple weekends, repeated rental periods, and extra materials. Your time and disruption have value.
Treating a complicated renovation like a simple cosmetic upgrade. Painting a ceiling and structurally altering it are very different jobs.
For example, HomeWorks Daily’s tray ceiling design and cost guide explores a design choice that can involve structural planning, electrical coordination, and professional installation.
A useful distinction is that DIY savings come from avoiding unnecessary labor costs—not from ignoring work that requires specialized skill.
How to Plan Your Next Home Upgrade
Before you spend a dime on new tools, make a project plan.
Step 1: Define the Result
Write down exactly what you’re trying to improve.
“Organize the garage” is broad. “Install two wall-mounted shelves for lightweight storage bins” is specific enough to plan.
Step 2: Check the Scope and Safety Risks
Determine whether the work affects structural framing, electricity, gas, plumbing, hazardous materials, waterproofing, or other regulated systems.
Check local permit and licensing requirements when applicable. If the work exceeds your skills or presents significant hazards, consult a qualified professional.
Step 3: Make a Complete Materials and Tools List
Separate the list into three groups:
- Tools you already own
- Tools you can borrow or rent
- Tools you genuinely need to purchase
Include fasteners, consumables, protective equipment, delivery, and disposal.
Step 4: Compare Your Options
Check total purchase costs, rental conditions, and relevant professional quotes.
When comparing a DIY budget with a contractor’s estimate, ensure both cover the same scope, materials, preparation, cleanup, and finishing work.
A lower DIY materials estimate isn’t directly comparable to a complete professional installation quote.
Step 5: Start Small and Test Your Approach
Measure carefully, read instructions, and test suitable materials in an inconspicuous location when recommended.
For example, check cabinet hardware alignment or paint appearance before committing to the entire room.
Step 6: Review What You Learned
After finishing, note which tools worked well, what materials were left over, and what you’d change.
Keep manuals, receipts, warranties, and relevant model numbers together.
That simple habit makes future projects easier and helps you avoid buying the same accessories twice.
Frequently Asked Questions
What tools do homeowners really need?
Most homeowners benefit from a tape measure, hammer, screwdrivers, pliers, adjustable wrench, level, utility knife, and basic safety equipment. A cordless drill/driver is a useful next purchase for many households. Specialized tools are best added when a planned project justifies their cost.
What is the best first power tool for a beginner?
A cordless drill/driver is usually the most versatile starting point. It handles common fastening and drilling tasks without requiring multiple specialized machines. Prioritize adjustable clutch settings, comfortable handling, and appropriate batteries and bits over advertised power alone.
Are expensive power tools worth buying for home use?
They can be, but only when their capabilities match your needs. Higher-priced models may offer improved durability, control, serviceability, or performance. For occasional light repairs, a reliable midrange model can provide sufficient value without premium features you’ll never use.
Is it cheaper to buy or rent home improvement tools?
Buying generally makes more sense for versatile tools used repeatedly. Renting is often preferable for expensive specialty equipment needed only occasionally. Compare the full ownership cost with rental fees, the number of use-days, transportation, and your storage and maintenance needs.
What is the best time of year to buy tools?
Major US retail events, including Memorial Day, Labor Day, and Black Friday, are worth checking, but no particular event guarantees the lowest price. Compare identical models, monitor prices over time, and buy when the total cost is attractive—not merely because a promotion has started.
Can beginners safely complete home upgrades themselves?
Many simple cosmetic and organizational projects are manageable with suitable tools, preparation, and safety precautions. Work involving structural changes, gas systems, significant electrical hazards, or complex plumbing is a different matter. Appropriate licensed professionals are often the safer choice, and local rules may require them.
How can I avoid buying unnecessary tools?
Choose a specific project before shopping. Inventory your existing equipment, identify the exact tasks and materials involved, and check whether borrowing or renting makes sense. If you can’t identify a realistic use for a specialized tool, it’s probably a purchase that can wait.
Final Thoughts
A better home doesn’t require a professional workshop or the latest collection of power tools.
Start with equipment that solves everyday problems. Learn to measure accurately, choose compatible accessories, recognize genuine discounts, and compare ownership costs with rental or professional alternatives.
Most importantly, don’t confuse doing everything yourself with saving money. Sometimes a basic hand tool is the smartest purchase. Other times, renting equipment or hiring a qualified professional is the better decision.
For more practical project ideas, maintenance advice, and buying guidance, explore the Home Improvement section at HomeWorks Daily. Your next worthwhile upgrade might be simpler—and less expensive—than you think.











One Response