You know that annoying bedroom door that suddenly starts scraping the carpet? Or the front door you have to lift by its handle just to get the latch to click?
It might seem like the whole door needs replacing. Fortunately, the problem is often much smaller: a loose hinge, a screw that’s lost its grip, or hardware that has shifted slightly out of position.
Learning how to fix a sagging door can save you an unnecessary replacement and help prevent damage to your flooring, door frame, and lock hardware.
The trick is figuring out what’s actually causing the sag before reaching for your toolbox.
Quick Answer: How to Fix a Sagging Door
To fix a sagging door, start by tightening the hinge screws, especially those on the top hinge. If screws spin without tightening, repair the stripped holes or use appropriately sized longer screws where solid framing is available. Check for damaged hinges, adjust minor alignment problems, and test the door’s swing and latch before considering more extensive repairs.
Why Is Your Door Sagging?
A door hangs from hinges attached to a vertical part of the frame called the door jamb. When the hinges, screws, or jamb shift, the door slab can drop out of alignment.
But not every sticking door is actually sagging.
Loose or Stripped Hinge Screws
Every time you open and close a door, its hinges support the door’s weight. Over time, screws can loosen, and the wood surrounding them may lose its ability to hold the threads.
The top hinge deserves particular attention because it helps resist the force pulling the upper part of the door away from its frame.
When that connection weakens, the opposite corner may drop.
Worn Hinges or Heavy Doors
Solid-core interior doors, large exterior doors, and older solid-wood doors place substantial demands on their hardware.
Bent hinge leaves, worn hinge pins, and undersized hinges can allow movement even when the screws are secure.
Simply tightening a damaged hinge won’t restore its original shape or strength.
Shifting Door Frames
Homes naturally experience some movement as materials respond to temperature, humidity, and structural loads.
Minor movement can change how a door fits. More significant settlement, moisture damage, or poor installation can shift the jamb itself.
In those cases, hinge adjustments might temporarily improve the fit without addressing the underlying cause.
Humidity and Wood Swelling
Wood absorbs moisture and can expand during humid weather.
A swollen door may rub against its frame even when every hinge is perfectly secure. Unlike genuine hinge sagging, the rubbing may disappear when conditions become drier.
That’s why identifying the problem matters more than immediately trimming the door.
How to Tell What’s Causing Your Door to Sag

Before removing any screws, close the door slowly and study the space around it.
That narrow space is called the reveal. Uneven door gaps often provide the first useful clue.
For example, if the gap above the door is wider near the hinges and narrows toward the latch side, hinge sagging is a possibility.
Use this troubleshooting table to narrow things down.
| What you notice | Possible cause | What to check first | Likely solution |
| Door drops on the latch side | Loose upper hinge | Upper hinge screws and movement | Tighten or reinforce the hinge |
| Screw spins without getting tight | Stripped screw hole | Wood around the screw | Repair the hole or use an appropriate longer screw |
| Door moves at the hinge pin | Worn or bent hinge | Pin, hinge leaves, and knuckles | Replace damaged hardware |
| Door sticks mainly in humid weather | Moisture swelling | Door edges and seasonal pattern | Control moisture and reassess |
| Door gaps remain uneven despite secure hinges | Frame or jamb movement | Jamb alignment and visible damage | Correct framing or seek professional help |
| Door closes but latch misses the opening | Door or strike plate misalignment | Reveal and latch position | Restore door alignment before adjusting the strike plate |
| Door drags across new flooring | Reduced floor clearance | Flooring height and door alignment | Diagnose clearance before considering trimming |
These are possible causes, not guaranteed diagnoses.
Try This Simple Two-Minute Hinge Test
- Open the door halfway.
- Support it gently near the bottom outer corner.
- Carefully lift the handle slightly while watching the hinges.
- Look for movement between the hinge leaves and the wood.
- Check whether any screws are visibly loose or pulling outward.
If the hinge leaf moves against the jamb, the fastening connection needs attention.
If the hinges remain firm, inspect the door slab and frame more closely.
For a broader explanation of these symptoms, Lowe’s provides a useful guide to common door problems and their solutions.
Tools and Materials You’ll Need
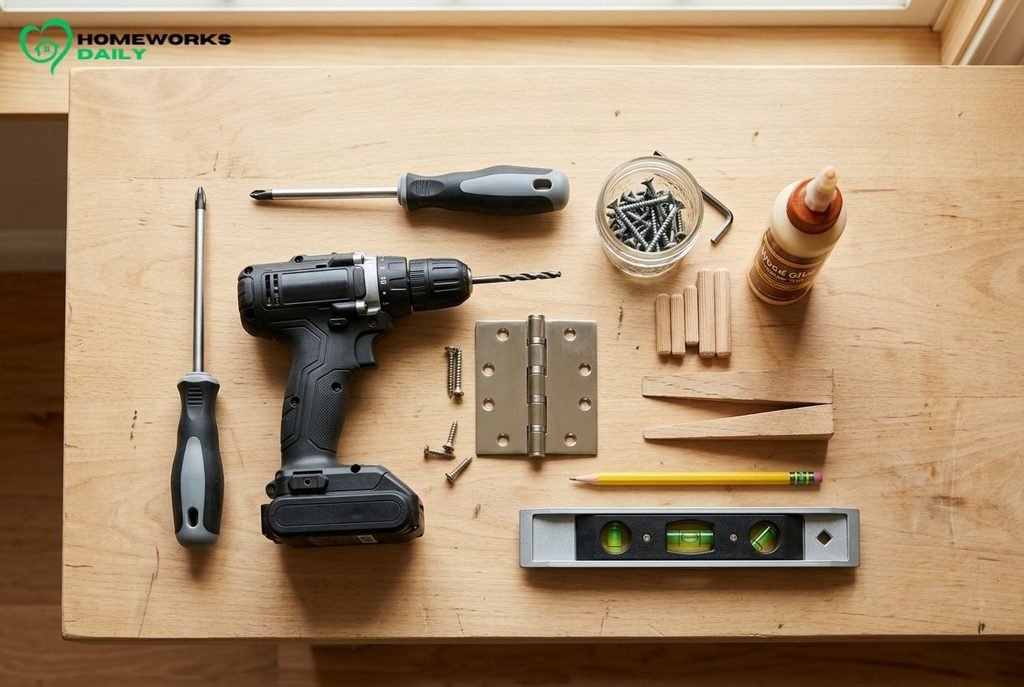
You probably won’t need a workshop full of tools for basic sagging door repair.
Start with what you already own.
Essential tools:
- Phillips or flathead screwdriver matching your screw heads
- Doorstop or wood wedge to support the door
- Flashlight for inspecting hinges and gaps
- Pencil for marking the original hardware position
Useful for particular repairs:
- Drill and correctly sized pilot bits
- Longer wood screws with heads that fit the hinges
- Wood glue and hardwood dowels
- Hammer and small saw for dowel repairs
- Hinge shims or suitable shim material
- Replacement hinges matching the door’s requirements
- Level or straightedge for checking alignment
- Safety glasses for drilling
A manual screwdriver is an excellent starting point. It provides better feedback than a powerful drill when you’re working with older screw holes.
If you’re building your first homeowner toolkit, HomeWorks Daily’s guide to choosing useful DIY tools without overspending can help you prioritize practical purchases.
Safety first: Keep fingers away from the hinge gaps, support the door before loosening hardware, and ask someone to help with heavy doors. Renters should check their lease or ask permission before drilling or modifying the door.
How to Fix a Sagging Door Step by Step
Work from the simplest repair to the more involved options.
Here’s the recommended order:
- Tighten existing screws.
- Consider longer screws where appropriate.
- Repair stripped screw holes.
- Replace damaged hinges if necessary.
- Correct minor hinge alignment.
- Examine the jamb and frame.
- Test the completed repair.
You don’t need to perform every step. Stop when you’ve identified and corrected the problem.
Step 1: Check and Tighten Loose Hinge Screws
Start with the top hinge.
Open the door enough to access the screws on both hinge leaves. One leaf attaches to the door slab, while the other attaches to the jamb.
Place a wedge beneath the outer bottom corner to support the weight without forcing the door upward.
Then:
- Use the correctly fitting screwdriver.
- Tighten loose screws gently until snug.
- Repeat on the middle and bottom hinges.
- Remove the wedge and close the door slowly.
Watch the top and latch-side gaps as you test.
If the door now swings freely and latches normally, you may already be finished.
Watch out: A screw that turns endlessly without becoming tight is probably no longer gripping the wood. Additional tightening won’t fix stripped threads.
Step 2: Decide Whether Longer Hinge Screws Will Help
Sometimes the original screws are too short to provide sufficient support.
Replacing one jamb-side screw in the upper hinge with a longer screw can improve the connection when sound framing is present behind the jamb.
For some conventional wood-framed residential doors, a 2½- to 3-inch wood screw may be suitable. However, screw length depends on the actual door assembly and framing arrangement.
To make this repair:
- Confirm that solid wood framing is available behind the jamb.
- Support the door and remove one upper hinge screw on the jamb side.
- Choose a suitable screw whose head sits flush with the hinge leaf.
- Drill an appropriate pilot hole if needed.
- Tighten gradually while watching the door’s alignment.
A longer screw can help anchor the hinge beyond the relatively thin jamb into stronger framing.
Don’t overtighten it. Pulling the jamb too far can create a new alignment problem.
Important: Do not blindly drive long screws into unknown wall construction. Metal frames, specialty doors, concealed services, and unusual installations require different fastening methods.
Step 3: Repair Stripped Hinge Screw Holes

A stripped hole usually announces itself clearly: the screw keeps turning but never becomes snug.
This means the wood fibers that previously held the screw threads are damaged.
For a conventional wood door or jamb, a hardwood dowel and wood glue can provide a more dependable repair.
Here’s the general process:
- Support the door securely.
- Remove the screws from the affected hinge leaf, leaving other hinges attached.
- Carefully move the loose leaf aside.
- Drill the damaged hole clean and round to match an appropriately sized hardwood dowel.
- Apply wood glue and insert the dowel until flush.
- Let the glue cure according to the manufacturer’s instructions.
- Drill a correctly sized pilot hole into the repaired wood.
- Reattach the hinge and tighten the screw.
The goal is to give the screw solid wood to grip again.
For small stripped holes on lightweight interior doors, glued wood splinters or toothpicks can sometimes work. However, a fitted hardwood dowel is generally the better choice for a badly damaged hole.
Ordinary cosmetic wood filler isn’t necessarily designed to support hinge-screw loads.
For additional details on this repair, see This Old House’s instructions for repairing loose door hinges.
Step 4: Inspect Bent, Loose, or Worn Hinges
What if the screws are secure, but the door still moves?
Look closely at the metal hardware.
Warning signs include:
- A visibly bent hinge leaf
- Loose or distorted hinge knuckles
- Excessive play around the hinge pin
- Severe rust or cracking
- A hinge that won’t sit properly in its recess
If the hinge itself is damaged, replacing screws won’t solve the problem.
Choose a replacement compatible with the existing hinge dimensions, screw pattern, door weight, and installation.
Support the door throughout the repair, and replace hardware one hinge at a time where the assembly permits.
For especially heavy doors, get help rather than attempting to hold the slab while removing its supports.
Step 5: Adjust Hinge Alignment or Use Shims
Not every alignment problem requires new hardware.
Sometimes a hinge is seated incorrectly in its recessed mounting area, called a mortise, or a small adjustment is needed to restore an even gap.
First, check that both hinge leaves sit flat and that paint buildup or debris isn’t preventing proper seating.
If the wood and hardware are sound, a thin, purpose-made hinge shim may correct a minor positioning problem.
The basic approach is:
- Support the door.
- Identify the hinge contributing to the uneven gap.
- Loosen or remove the appropriate hinge leaf fasteners.
- Position a thin shim behind the leaf if the geometry calls for it.
- Refasten the leaf and check the reveal.
Shim placement matters. Adding material behind the wrong hinge can make the binding worse.
Avoid stacking thick pieces of cardboard behind loose hardware. Shimming changes position; it does not repair weak fastening.
If the hinges require bending, relocation, or substantial mortise changes, a carpenter may be the safer choice.
Step 6: Check the Door Jamb and Frame
Suppose the hinges are firm, the screws grip properly, and the door still looks crooked.
The problem may be the frame.
Use a level to check the hinge-side jamb for plumb, then inspect the top and opposite side for visible distortion.
Look for:
- Gaps opening around the trim
- Cracks extending from the corners of the opening
- Soft, rotten, or water-damaged wood
- A jamb moving separately from surrounding framing
- Multiple doors developing alignment problems
A loose jamb may need to be properly secured, shimmed, or reinstalled.
But if the wall or opening itself has shifted, simply pulling the jamb toward a stud with another long screw could conceal a larger issue.
Significant movement deserves professional assessment before making further adjustments.
Step 7: Test the Door’s Swing, Gaps, and Latch
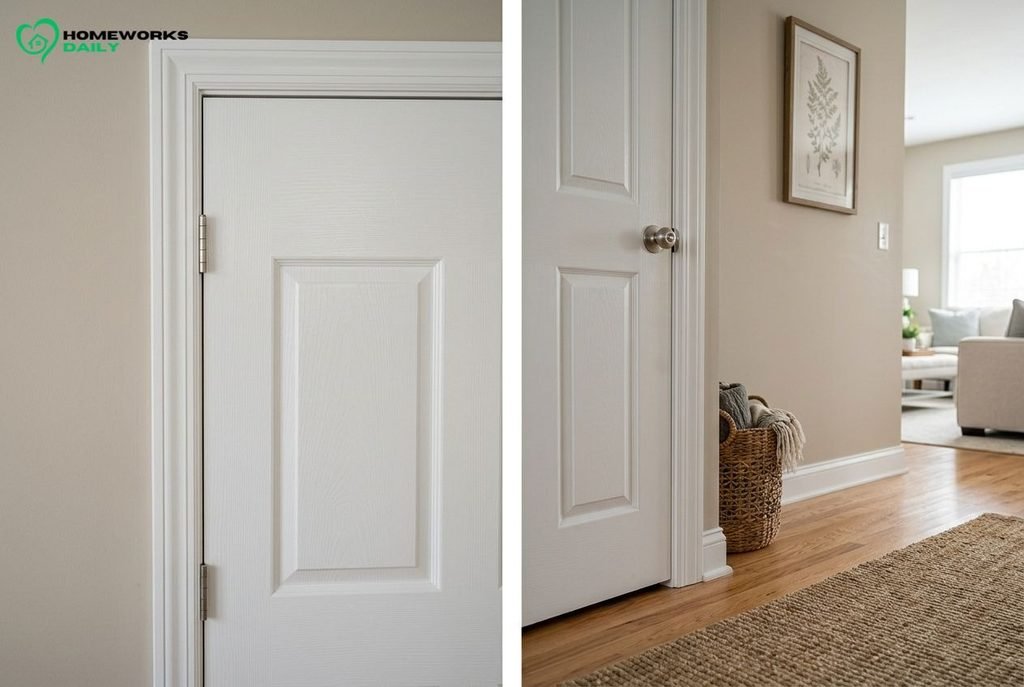
Once you’ve completed the necessary repair, remove the support wedge.
Slowly open and close the door several times.
Check that:
- The door moves without scraping.
- The reveal is reasonably even.
- The hinges stay firmly seated.
- The latch enters the strike plate opening without lifting or forcing the handle.
- Exterior locks engage smoothly.
- Weatherstripping makes appropriate contact without excessive compression.
If the door swings freely and its gaps look correct, but the latch still misses the strike plate slightly, a strike plate adjustment might be appropriate.
That’s different from fixing a genuinely sagging door.
Moving the strike plate alone can hide hinge problems while leaving the door crooked. Always restore the door’s alignment first.
What If Your Door Still Sags?
If the basic repairs don’t work, resist the temptation to keep tightening everything.
Instead, narrow down what’s left.
If the problem returns after a few days: Check whether the repaired screw holes are holding and whether the jamb moves under the door’s weight. Repeated failure may mean damaged framing or unsuitable hinges.
If the door binds mainly during humid weather: Examine swelling, finish damage, and moisture exposure. A straight door that expands seasonally needs a different remedy from one with loose hinges.
If the door appears twisted: Hold a straightedge against the slab and inspect whether its corners sit in the same plane. A substantially warped door may need replacement.
If multiple doors begin sticking: Check for cracks, changing floor levels, or other signs of movement. These symptoms don’t automatically mean foundation trouble, but they warrant investigation.
A useful decision framework is simple:
Tighten sound hardware. Reinforce stripped wood. Adjust minor positioning problems. Replace damaged hinges. Call a professional when the frame or structural support is questionable.
Common Sagging Door Repair Mistakes to Avoid
A door that rubs can be frustrating enough to make almost any quick fix appealing. Some shortcuts, however, create additional work.
- Sanding or planing too early. If a loose hinge caused the door to drop, removing wood may leave an oversized gap once the hinge is repaired.
- Overtightening screws. Excessive force can strip wood threads or distort the jamb.
- Using the wrong screw head. A protruding screw head can prevent hinge leaves from closing properly.
- Ignoring damaged hinges. Secure screws can’t compensate for badly worn metal hardware.
- Adding shims without checking alignment. The wrong shim position can increase friction or create another gap.
- Moving the strike plate first. This may improve latching without correcting why the door dropped.
The smartest repair is usually the smallest one that corrects the underlying cause.
How Much Does It Cost to Fix a Sagging Door?
The cost depends mainly on whether you’re fixing a loose screw or dealing with damaged framing.
| Repair option | Main cost considerations |
| Tightening existing screws | $0 in new materials if you already have the necessary screwdriver |
| Replacing hinge screws | Suitable screws and possibly a drill bit |
| Repairing stripped holes | Wood glue, dowels, screws, and any needed tools |
| Replacing hinges | Hardware type, size, finish, and load capacity |
| Hiring a professional | Service-call charges, labor, materials, and repair complexity |
| Rebuilding or replacing a frame | Carpentry, trim work, finishing, and possible structural repairs |
For a straightforward interior-door issue, DIY may be economical because you’re purchasing only a few small supplies.
A professional repair will usually involve labor charges in addition to materials. The location, door weight, access, and amount of damage all affect the quote.
Before accepting an estimate, ask whether it includes hardware, jamb repairs, finishing work, and testing the lock.
Avoid buying a complete replacement door until you’ve confirmed that the existing slab and frame cannot reasonably be repaired.
How to Prevent a Door From Sagging Again
A little routine attention can help prevent the same problem from returning.
- Check hinge screws periodically. Snug loose screws before they damage the surrounding wood.
- Avoid hanging heavy objects from handles. Additional loading can stress the door and hardware.
- Address rubbing promptly. Continued scraping can damage flooring, paint, and door edges.
- Maintain appropriate indoor humidity. This is especially helpful for wood doors.
- Keep hinges clean. Lubricate when needed using a product appropriate for the hardware.
- Use properly rated hinges. Heavy doors need suitable hardware and dependable fastening.
After a repair, take a quick photograph of the closed door’s gaps. If sticking returns, the photo can help reveal what changed.
When Should You Call a Professional?
Most ordinary loose-hinge problems are reasonable DIY projects. Others involve risks that make professional help worthwhile.
Consider contacting a qualified carpenter or door installer when:
- A heavy exterior door is difficult to support safely.
- The door won’t lock securely, creating a security concern.
- The frame is cracked, rotting, or separating from surrounding construction.
- The opening appears significantly out of square.
- Repairs keep failing despite sound replacement hardware.
- You suspect structural movement or significant water damage.
- The door has specialized hardware or is part of a fire-rated assembly.
For fire-rated doors, including some doors between garages and living spaces and doors in multifamily buildings, avoid unapproved drilling, trimming, or hardware modifications.
The Steel Door Institute’s fire-door guidance recommends contacting the manufacturer before undertaking field repairs to fire-rated doors.
A professional can determine whether repairing the existing assembly is appropriate or replacement is necessary.
Frequently Asked Questions
1. Can you fix a sagging door without removing it?
Yes. Many sagging doors can be repaired while they remain hanging. Tightening hinge screws, replacing an accessible screw with a suitable longer one, and making certain minor adjustments generally don’t require removing the entire door. Support the slab with a wedge, and never disconnect all its supporting hinges without proper help.
2. Why does the top hinge keep coming loose?
The top hinge helps resist the force that pulls the upper part of the door away from the jamb. If its screws repeatedly loosen, their holes may be stripped, the wood may be damaged, or the door may be too heavy for the installed hardware. Inspect the fastening material rather than continually tightening the same screws.
3. Will a longer screw always fix a sagging door?
No. A longer screw helps only when it reaches suitable material and improves the hinge’s anchorage or jamb position. It won’t straighten a bent hinge, repair a warped slab, or correct significant frame movement. The screw must also fit the hinge properly and be suitable for the construction behind it.
4. Can you fix a sagging door with cardboard?
A thin piece of cardboard can sometimes demonstrate how a small hinge-position adjustment affects the door gap. However, ordinary cardboard can compress or deteriorate and isn’t a dependable substitute for a properly fitted hinge shim. More importantly, cardboard cannot repair stripped screw holes or damaged hinges.
5. Why does my door scrape the floor even after I tighten the hinges?
The problem may involve worn hinges, a shifted jamb, a warped door, or flooring installed higher than the previous surface. Check the reveal and bottom clearance before removing material. If the frame and hinges are correctly aligned and the flooring is the actual obstruction, carefully adjusting the door’s clearance may be necessary.
6. How do I know if my door is sagging or swollen?
Sagging often creates a tilted appearance, uneven gaps, and a dropped latch-side corner. Swelling is more likely when a wood door sticks during humid periods without visible hinge movement. Examine the hinge connections, compare the gaps, and check for moisture or finish damage. Both problems can occur together.
7. Can renters repair loose door hinges themselves?
It depends on the lease and the repair involved. Tightening an accessible screw may seem minor, but replacing screws, drilling holes, removing hardware, or modifying the door can require landlord approval. Report serious latching problems promptly, particularly on exterior, security, or fire-rated doors, and ask the property manager to arrange appropriate repairs.
Final Thoughts
A sagging door doesn’t automatically mean you need a new door—or an expensive repair.
In many cases, the solution begins with a screwdriver, a careful look at the upper hinge, and a little patience.
The important part of learning how to fix a sagging door is recognizing whether the trouble comes from loose hardware, damaged wood, hinge alignment, or the frame itself.
Start with the simplest correction, test your progress, and don’t force a repair that isn’t working.
For more practical maintenance ideas and approachable DIY projects, explore the HomeWorks Daily home-improvement guides. A few well-chosen repairs can make everyday life at home noticeably easier.