A heavy British shower can expose a guttering problem very quickly. Water spills over the roof edge, runs down brickwork, splashes across paving and collects around flower beds or the base of the house. What looks like a minor nuisance can become a recurring drainage problem if rainwater isn’t directed away properly.
The good news is that installing a Rain Gutter can be a manageable DIY project on a straightforward, low-level property — provided you plan the route carefully, use a compatible gutter system and take working-at-height safety seriously.
In simple terms, the job involves planning the gutter run, measuring the roofline, creating the correct fall towards an outlet, fixing the brackets, joining the gutter sections, connecting the downpipe and then testing the complete system. The exact dimensions, bracket spacing and expansion requirements depend on the gutter manufacturer’s system, so the product instructions should always take priority.
Quick Answer: How Do You Install a Rain Gutter?
To install a Rain Gutter, first plan where rainwater will flow and where the downpipe will discharge. Measure the roofline, mark a suitable fall towards the outlet, install the manufacturer’s brackets at the specified spacing, fit the gutter sections and allow for expansion at joints. Connect the outlet and downpipe, then test the system with water for leaks, poor flow and overflow.
For UK homes, the drainage destination matters too. Building Regulations guidance says rainwater should generally be discharged to an adequate soakaway or other infiltration system where practicable, then a watercourse, or a sewer where those options aren’t reasonably practicable.
What Is a Rain Gutter and Why Does It Matter?
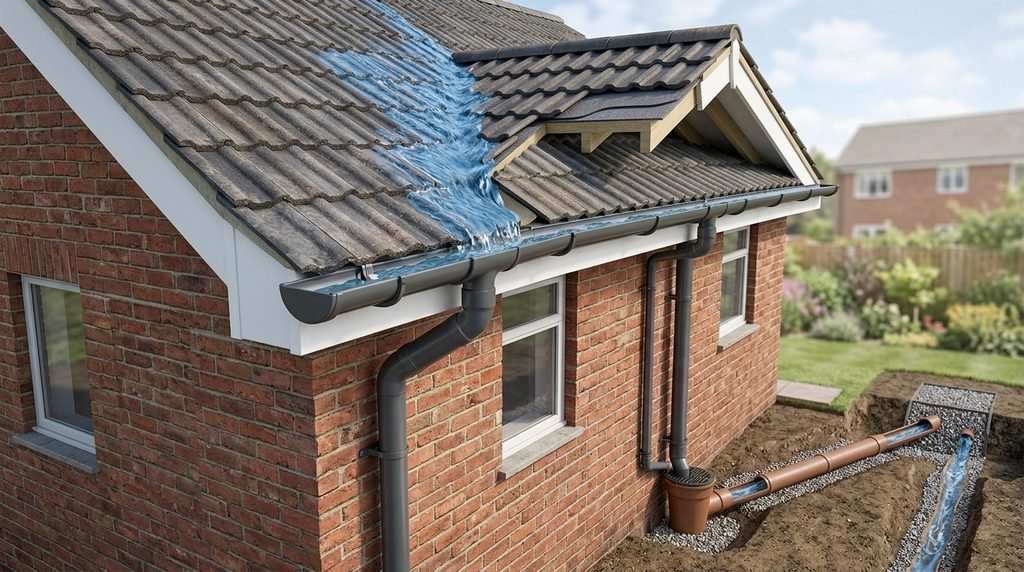
A rain gutter is the channel fitted along the lower edge of a roof to collect rainwater running off the roof surface.
The basic relationship is straightforward:
Roof → Rain Gutter → Outlet → Downpipe → Drainage destination
Without effective roof drainage, rainwater can fall directly against walls, paths, patios and planting areas. Concentrated discharge close to the building can also contribute to waterlogging and damp-related problems.
A properly installed gutter system helps:
- Collect roof runoff.
- Direct rainwater towards controlled outlets.
- Reduce uncontrolled water falling beside walls.
- Protect paving, soil and planted areas from concentrated runoff.
- Move water towards an appropriate drainage point.
- Reduce the likelihood of overflowing water reaching vulnerable parts of the building.
UK Approved Document H specifically addresses gutters and rainwater pipes. It states that gutters should have their fall towards the nearest outlet and that overflow should be able to discharge clear of the building rather than creating an additional risk to the structure.
Guttering or Rain Gutter: What’s the Difference?
In the UK, you’ll hear guttering, gutters, rainwater goods and sometimes rain gutter used to describe parts of the same general roof-drainage system.
The terminology matters less than understanding how the components work together.
A complete system can include:
- Gutter lengths
- Running outlets
- Stop ends
- Union brackets
- Internal or external angles
- Fascia brackets
- Rafter brackets
- Downpipes
- Offset bends
- Pipe clips
- Shoes
- Leaf guards or gutter guards
The important thing is that compatible components are used together.
Tools and Materials You’ll Need
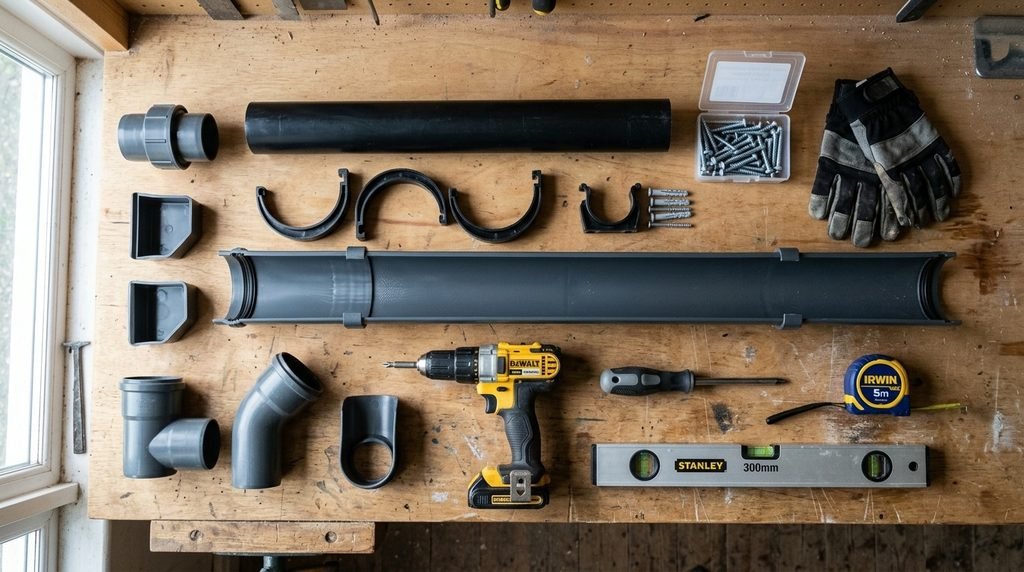
Before starting, check the manufacturer’s installation guide for your particular gutter profile. Different systems can use different bracket arrangements, joint details and expansion provisions.
Typical materials
- Gutter sections
- Running outlet
- Downpipe
- Gutter brackets
- Union brackets
- Stop ends
- Angles or corners where required
- Downpipe clips
- Appropriate corrosion-resistant fixings
- Manufacturer-approved lubricant or seal treatment where specified
- Appropriate connectors or adaptors
- Pipe shoe or suitable outlet connection
- Gutter guard, if required
Useful tools
- Tape measure
- Pencil or marker
- Spirit level
- String or chalk line
- Fine-toothed saw or hacksaw suitable for the gutter material
- Drill/driver
- Screwdriver or appropriate driver bit
- Suitable drill bits for the fixing surface
- Ladder or appropriate access equipment
- Gloves
- Eye protection
- Tool belt or other way of carrying light tools safely
Don’t automatically buy sealant and plan to seal every joint. Many modern plastic gutter systems use seals or jointing mechanisms designed to accommodate movement. Adding an incompatible sealant can interfere with the manufacturer’s intended system.
How to Install a Rain Gutter Step by Step
The installation process is fairly logical, but the details make the difference between a gutter that looks right and one that actually performs properly during heavy rain.
Step 1: Plan the Gutter Run
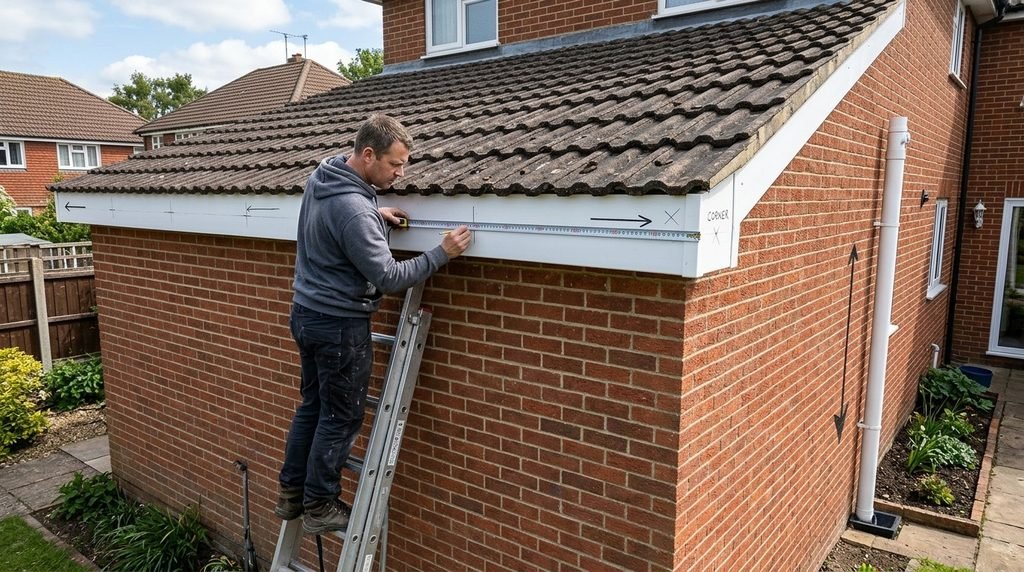
Start from the roof rather than the gutter itself.
Walk around the property and identify:
- The edges of the roof that need drainage.
- Existing guttering and outlets.
- Suitable downpipe positions.
- Corners and changes in direction.
- Long uninterrupted runs.
- Extensions and conservatories.
- Lower roofs receiving water from higher roofs.
- Where each downpipe will discharge.
- Whether the existing fascia is sound enough to carry the brackets.
Think about where the water goes after it leaves the downpipe.
A downpipe that simply empties beside a wall isn’t necessarily solving the original problem.
For a new installation, the drainage arrangement should be considered as part of the whole system rather than as an afterthought. UK Building Regulations require adequate provision for carrying rainwater from roofs and set out a priority for suitable discharge arrangements.
Step 2: Measure the Roofline
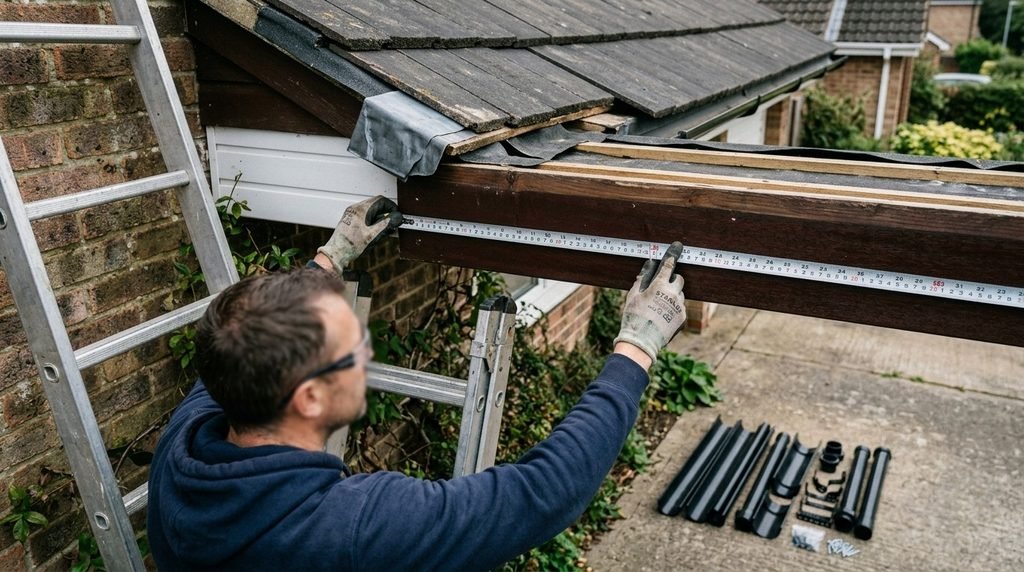
Measure each straight gutter run separately.
Record:
- Overall length.
- Number of corners.
- Number of outlets.
- Number of stop ends.
- Number of unions.
- Downpipe lengths.
- Offset requirements.
- Approximate bracket quantity.
Don’t order materials based simply on the outside dimensions of the house.
Roof geometry can change the actual gutter run, particularly around:
- Bay windows
- Extensions
- Conservatories
- Porches
- Dormers
- Roof valleys
- Multiple roof levels
It’s sensible to sketch the roofline and mark every component before buying anything.
That simple five-minute exercise can prevent a surprisingly frustrating second trip to the builders’ merchant.
Step 3: Mark the Gutter Fall
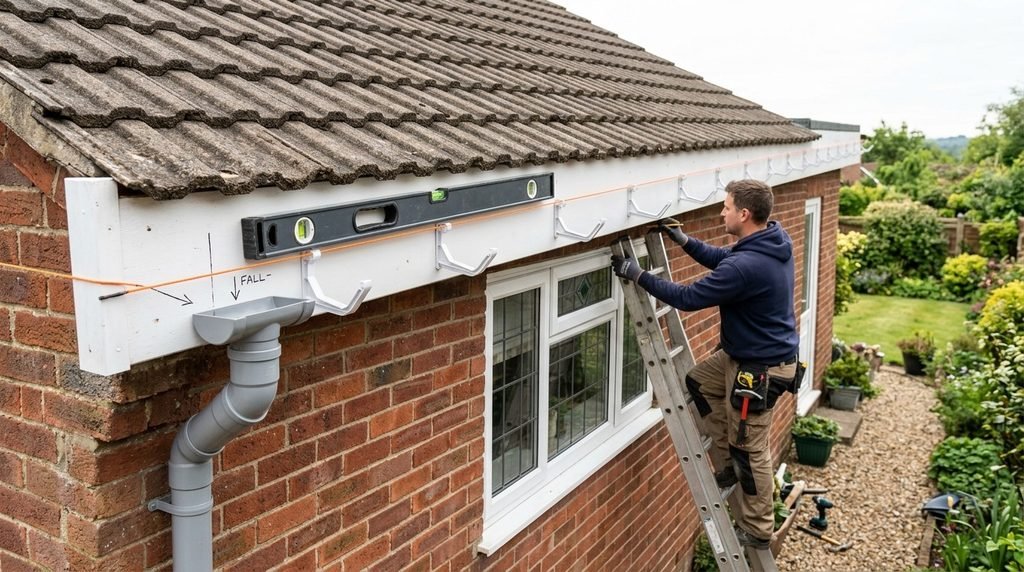
A gutter needs to move water towards its outlet rather than leaving water sitting in the channel.
The exact fall should come from the gutter system’s installation instructions. There isn’t one universal number that should be applied to every product.
For example, FloPlast recommends a gradient no greater than 1:350 for its domestic eaves gutter systems, while other systems may specify different arrangements. Polypipe documentation, for example, recommends a fall of 1:600 for certain rainwater systems.
That’s why copying a measurement from another guttering system isn’t a good shortcut.
The general principle is:
High point → gradual fall → outlet → downpipe
A fall that’s too shallow can encourage standing water and debris accumulation. A fall that’s excessive can leave the gutter visually awkward and create a large gap between the roof edge and gutter.
The manufacturer’s instructions should therefore be treated as the controlling specification.
Step 4: Install the Brackets
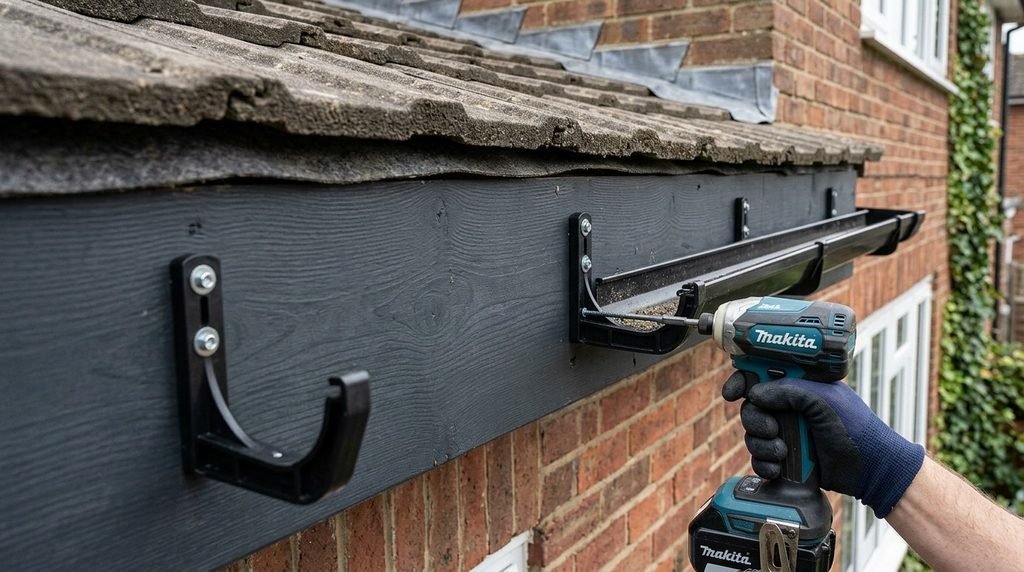
Fix the first bracket at the high end of the gutter run, then establish the outlet position and use a string line to mark the remaining bracket positions.
Bracket spacing varies between systems and profiles.
As one example, FloPlast’s installation guide specifies fascia brackets at no more than 1 metre apart, with additional support close to angles and stop ends.
Polypipe’s technical guidance also gives maximum support centres depending on the gutter profile and recommends support adjacent to gutter angles.
The lesson is simple: don’t assume every gutter uses the same bracket spacing.
Also inspect the fixing surface before installing anything.
If the fascia is rotten, cracked or structurally unsound, adding more screws won’t solve the underlying problem.
You may need:
- Rafter brackets
- Rise-and-fall brackets
- Replacement fascia
- Appropriate structural repair
FloPlast, for example, provides alternative bracket arrangements for installations without conventional fascia boards.
Step 5: Fit the Gutter Sections
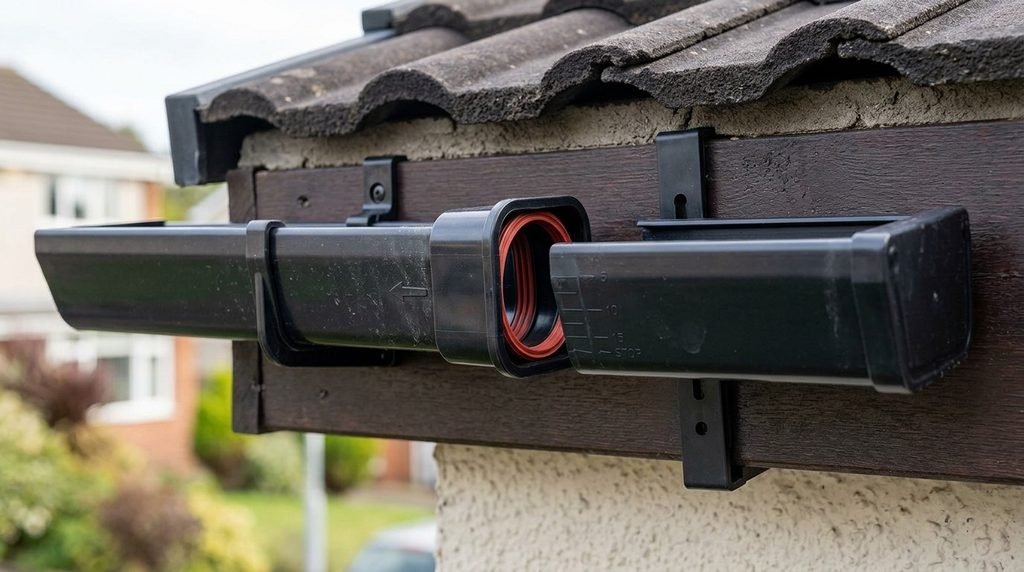
Once the brackets are correctly positioned, begin fitting the gutter.
Follow the manufacturer’s method for clipping the gutter into its brackets.
At this stage, pay particular attention to:
- Correct insertion depth.
- Joint markings.
- Seal position.
- Expansion allowance.
- Correct orientation of outlets.
- Support near corners.
- Clean, square cuts.
Don’t force a section into a fitting simply because it almost fits.
Many modern plastic systems are designed to accommodate thermal movement. The gutter needs room to expand and contract rather than being locked rigidly at every joint.
FloPlast notes that its fittings incorporate expansion tolerances and that correct positioning within the marked areas is important. Its technical information also reports measurable movement over a 4-metre length under temperature changes.
Step 6: Install the Outlet and Downpipe
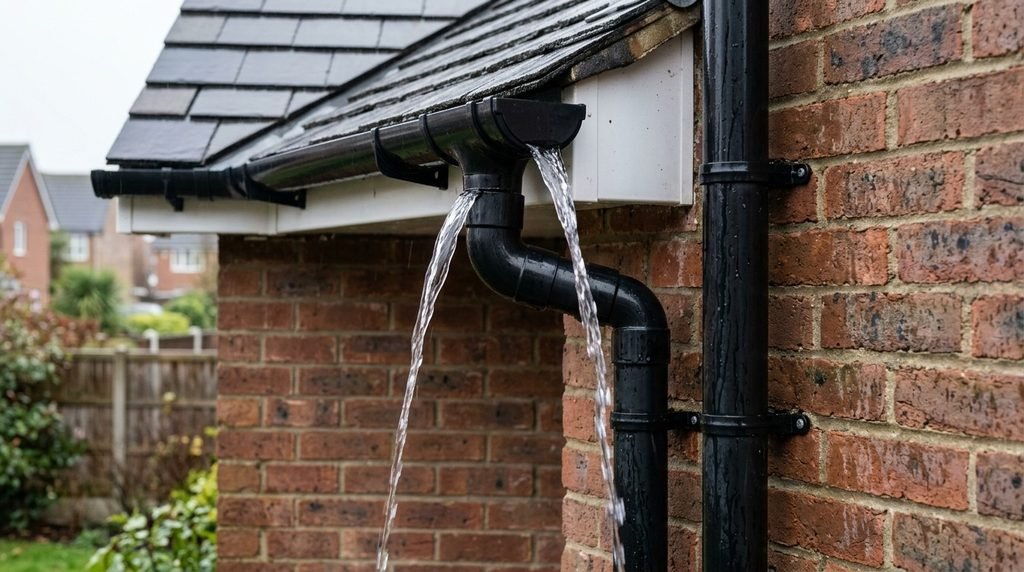
The outlet is where the gutter system changes direction from horizontal collection to vertical drainage.
Position it according to your original plan.
Then install the downpipe using the appropriate bends and clips.
A good downpipe route should:
- Remain securely supported.
- Avoid unnecessary bends.
- Direct water away from the building.
- Connect properly to the drainage arrangement.
- Avoid discharging onto areas where water will simply collect against the wall.
Downpipe clip spacing also varies between products. FloPlast, for example, recommends clips at maximum intervals of 1.8 metres and below certain fittings and joints.
If a downpipe discharges onto a lower roof or paved area, UK guidance specifically considers how the water is diverted away from the building.
Step 7: Test the System
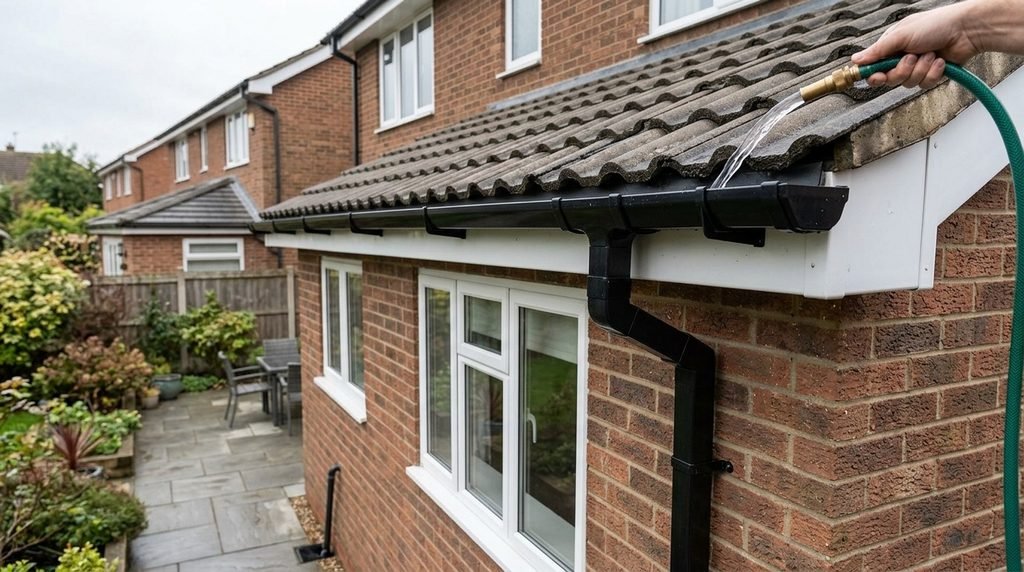
Don’t wait for the next storm to discover that something is wrong.
Run a controlled amount of water into the gutter and watch what happens.
Check:
- Does water travel towards the outlet?
- Does water sit in low spots?
- Are any joints leaking?
- Does the gutter sag?
- Does water spill over the front edge?
- Does the outlet handle the flow?
- Is the downpipe secure?
- Does water discharge where intended?
- Does water splash back against the wall?
A proper test is especially valuable at corners and joints because these are common locations for installation problems to become obvious.
Rain Gutter Installation Checklist
| Task | What You Need | Key Point |
| Planning | Tape measure, sketch, pencil | Map outlets, corners and drainage |
| Measuring | Tape measure | Measure each gutter run separately |
| Setting the fall | Spirit level, string line | Follow the manufacturer’s specified gradient |
| Bracket installation | Drill and appropriate fixings | Follow system-specific spacing |
| Gutter fitting | Gutter, unions, stop ends | Respect joint and expansion markings |
| Outlet installation | Running outlet, downpipe | Plan the downpipe route first |
| Downpipe fitting | Pipe, bends and clips | Keep the route secure and controlled |
| Testing | Hose or controlled water supply | Check flow, leaks and overflow |
How Much Slope Should a Rain Gutter Have?
There isn’t a single slope that applies to every Rain Gutter system.
The required fall depends on the gutter profile and manufacturer’s design. For example, FloPlast recommends a maximum gradient of 1:350 for its domestic eaves gutters, while Polypipe recommends 1:600 for certain systems.
The important principle is that water should move towards the outlet without creating an unnecessarily steep gutter line.
Always use the installation specification for the exact gutter system you’re fitting.
Common Rain Gutter Installation Mistakes
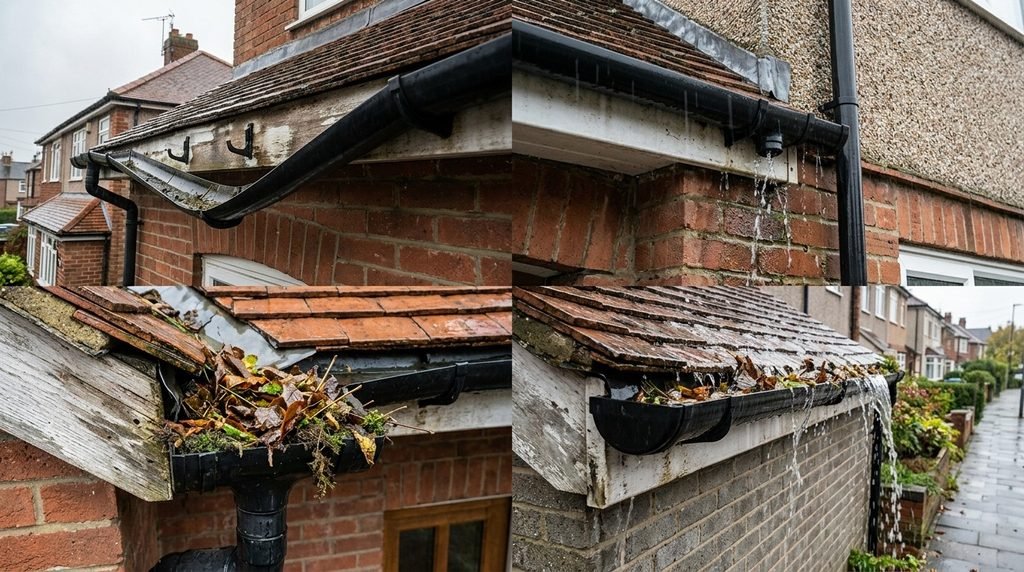
A gutter can be securely screwed to the house and still perform badly.
These are some of the problems worth watching for.
Making the gutter completely level
A visually level gutter isn’t necessarily the best-performing gutter.
If the system requires a fall, provide it towards the outlet.
Using the wrong bracket spacing
Long unsupported sections can sag over time, especially where water and debris accumulate.
Use the spacing specified for the particular profile.
Ignoring thermal expansion
Plastic guttering moves as temperatures change.
If joints are installed without the required movement allowance, sections can pull against fittings or create leaks.
Fixing into a damaged fascia
A gutter bracket is only as reliable as the structure supporting it.
If the timber behind the bracket is deteriorated, investigate and repair that problem first.
Putting the downpipe in an inconvenient location
The easiest place to install a downpipe isn’t always the best place to send water.
Think about where the discharge will ultimately go.
Making unnecessary joints
Every additional joint is another component that needs to be correctly aligned and supported.
Plan your lengths efficiently where the manufacturer’s system allows it.
Assuming bigger is always better
A larger gutter isn’t automatically the right answer.
Gutter and downpipe capacity should be considered alongside roof area, rainfall intensity, outlet arrangements and the manufacturer’s system.
UK Approved Document H includes design guidance for gutters and rainwater pipes, including rainfall intensity and overflow considerations.
How Do You Stop Rain Gutters From Overflowing?
Start by identifying where the overflow occurs.
If the entire gutter overflows during heavy rain, the system may have a capacity, outlet or drainage problem.
If water overflows at one particular point, the cause may be:
- A blocked section.
- Incorrect gutter fall.
- A sagging gutter.
- A poorly positioned outlet.
- An undersized or unsuitable component.
- Water entering the gutter too quickly from a roof valley or upper roof.
- Debris restricting the flow.
Don’t immediately solve an overflow by simply adding more sealant.
Find the reason water isn’t travelling through the system properly.
Approved Document H also states that gutters should be arranged so excess water can discharge clear of the building during rainfall above the design capacity.
Check for more HomeWorks Daily Guide
UK Considerations for Different Types of Homes
Terraced Houses
Terraced properties can have narrow side passages, shared boundaries and limited access.
A downpipe may also be located close to a neighbouring property, so drainage arrangements need more careful planning.
Don’t alter a shared or neighbouring drainage arrangement without understanding who owns it and what the existing system serves.
Semi-Detached Homes
The junction between the two properties deserves particular attention.
Check:
- Roof runoff direction.
- Existing gutter ownership.
- Shared drainage arrangements.
- Flashing and roof junctions.
- Whether your work affects neighbouring property.
Older Houses
Older properties can present surprises behind the visible gutter.
You may encounter:
- Timber fascias in poor condition.
- Original cast-iron guttering.
- Unusual roof profiles.
- Non-standard brackets.
- Previously modified downpipes.
- Older drainage connections.
In such cases, replacing a section with modern PVC guttering may require compatible adaptors rather than simply cutting out the old section.
Extensions and Conservatories
An extension often creates a second drainage problem.
Water from the main roof may discharge towards a lower roof, while the extension itself has another gutter run.
The junction between the two needs to be planned rather than improvised.
Safety: Is Installing a Rain Gutter Safe to DIY?
The gutter itself may be relatively simple to fit. Working several metres above the ground is the part that deserves serious attention.
The UK Health and Safety Executive advises avoiding work at height where reasonably practicable and using appropriate equipment where it cannot be avoided. It also notes that ladders can be suitable for low-risk, short-duration work when used safely.
Before climbing, consider:
- Is the ground firm and level?
- Is the ladder suitable for the task?
- Can it be secured?
- Can you maintain three points of contact?
- Are you likely to overreach?
- Are you carrying bulky gutter sections?
- Is the weather dry and reasonably calm?
- Are there overhead electrical lines?
- Could tools or materials fall onto people below?
HSE guidance specifically warns against resting ladders against weak surfaces such as plastic gutters and advises against overreaching.
When should you hire a professional?
Professional help makes sense when:
- The roof is unusually high.
- Access is difficult.
- A scaffold or platform is needed.
- The fascia is structurally damaged.
- The roof has complicated valleys or multiple levels.
- The property has difficult drainage.
- You’re working close to overhead electrical lines.
- The existing system is shared or unusually configured.
- You aren’t confident working at height.
There’s no benefit in turning a relatively ordinary drainage project into a preventable fall.
Rain Gutter Maintenance After Installation
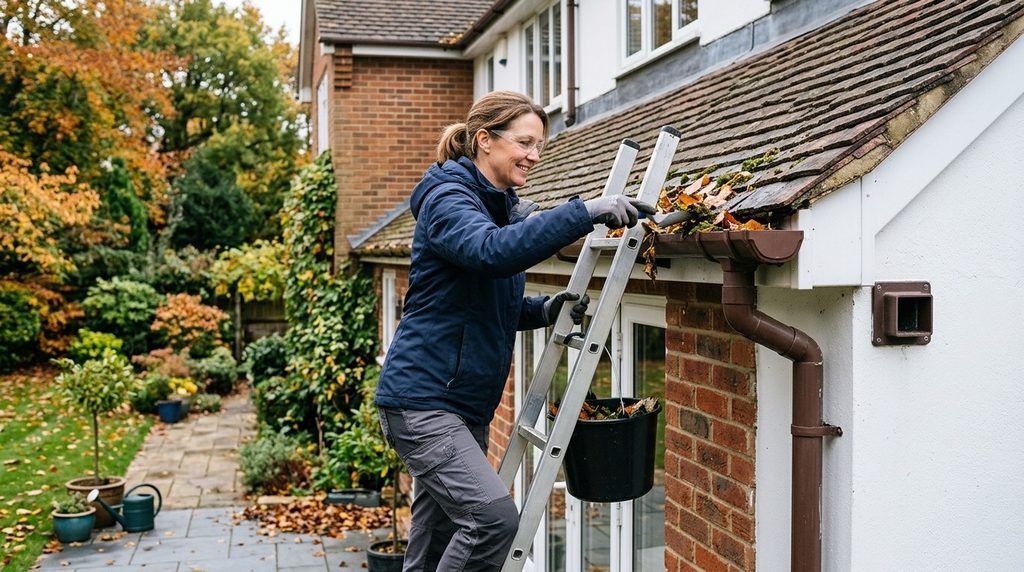
Installation is only the beginning.
A good gutter system still needs periodic inspection, particularly after autumn leaf fall and periods of severe weather.
Maintenance checklist
- Remove leaves and accumulated debris.
- Check outlets for blockages.
- Inspect joints for leaks.
- Look for sagging sections.
- Check brackets and fixings.
- Inspect downpipe connections.
- Check discharge points.
- Look for water staining on walls.
- Check for plant growth or moss buildup.
- Inspect after particularly heavy rainfall.
If your property is surrounded by mature trees, you may need to inspect the gutters more frequently than a home with an unobstructed roofline.
A gutter guard can reduce the amount of larger debris entering the system, but it isn’t a substitute for inspection. Leaves, moss and fine material can still accumulate around guards and outlets.
What to Check After Heavy Rain
A dry-day inspection won’t always reveal a drainage problem.
After a significant downpour, safely inspect the system from ground level.
Look for:
- Water cascading over the front of the gutter.
- Water escaping from joints.
- Persistent dripping from one connection.
- Water collecting beneath a downpipe.
- Splashing against the wall.
- Gutter sections visibly sagging.
- Water remaining in the gutter after rainfall stops.
Heavy rain is effectively a real-world performance test.
If the system only fails during unusually intense rainfall, that doesn’t automatically mean the installation is defective. The design capacity and drainage arrangement need to be considered. But repeated overflow should never simply be ignored.
How Much Does It Cost to Install a Rain Gutter?
There isn’t one reliable UK-wide installation price because the total depends heavily on the property and the system.
For a DIY project, the main cost categories are:
- Gutter sections
- Brackets
- Unions
- Angles
- Outlets
- Stop ends
- Downpipes
- Pipe clips
- Fixings
- Access equipment
- Replacement fascia or timber if necessary
- Drainage modifications
Professional installation adds labour and potentially access equipment.
When comparing quotes, don’t compare only the total figure. Ask whether the price includes:
- Removal of existing guttering.
- Disposal.
- New brackets.
- Downpipes.
- Corners and outlets.
- Fascia repairs.
- Access equipment.
- Drainage connections.
- Testing.
- Cleanup.
A quote that looks cheaper because it excludes essential components isn’t necessarily cheaper once the project is complete.
When Should You Repair or Replace Guttering?
Repair may be sensible when the problem is isolated.
For example:
- One damaged joint.
- A single loose bracket.
- One cracked fitting.
- A localised leak.
- A small section of damaged gutter.
Replacement becomes more reasonable when the system has widespread problems.
Look for:
- Multiple leaking joints.
- Repeated sagging.
- Cracked sections throughout the run.
- Corrosion in metal guttering.
- Poorly matched replacement components.
- Failing fascia.
- Persistent overflow despite cleaning.
- A drainage arrangement that no longer suits the roof.
If the supporting fascia has failed, replacing the gutter alone may only provide a temporary fix.
What to Ask a Gutter Installer
If you decide to hire a professional, ask questions before work starts.
Useful questions include:
- Which gutter system are you proposing?
- How will the gutter fall be established?
- Where will the downpipes discharge?
- Are the existing fascias sound?
- Will old guttering be removed?
- How will waste be disposed of?
- What bracket spacing will be used?
- How will expansion be accommodated?
- Does the quote include corners and outlets?
- Will you test the completed system?
- What happens if damaged fascia or roof components are discovered?
- Is access equipment included in the price?
A good installer should be able to explain the drainage route, not just tell you how much the guttering will cost.
Can You Install a Rain Gutter Yourself?
Yes, a straightforward single-storey gutter installation can be a realistic DIY project for a competent homeowner, particularly when the existing fascia is sound and the gutter system is designed for relatively simple installation.
The bigger issue is access.
If the work requires prolonged ladder use, awkward roof access, heavy materials at height or work near fragile surfaces or electrical hazards, professional installation may be the safer option. HSE recommends proportionate planning and appropriate equipment for work at height.
How Often Should Rain Gutters Be Cleaned in the UK?
There isn’t one schedule that suits every property.
A home beneath mature trees may need more frequent cleaning than a property with a clear roofline.
As a practical starting point, inspect gutters at least seasonally and pay particular attention after autumn leaf fall and severe weather.
The important thing is to inspect rather than blindly follow a calendar.
Can a Rain Gutter Be Installed Without a Fascia Board?
Yes, some gutter systems offer rafter brackets, rise-and-fall brackets or other support methods for properties without a conventional fascia.
The correct solution depends on the roof construction and gutter system.
Do not improvise a fixing into masonry, roof tiles or another weak surface simply because a standard fascia bracket isn’t available. Use a support system designed for the installation.
FloPlast, for example, documents alternative bracket arrangements for installations without fascia boards.
Why Is My Rain Gutter Leaking at the Joints?
A leaking joint can result from incorrect assembly, damaged seals, poor alignment or failure to allow the gutter to move as intended.
Check whether:
- The gutter is inserted to the manufacturer’s marked position.
- The seal is correctly seated.
- The fitting is compatible with the gutter.
- The gutter is correctly supported.
- The joint has been installed according to the manufacturer’s expansion requirements.
Replacing the fitting may be necessary if the seal or component is damaged.
FAQ Section
Can I install a Rain Gutter myself?
Yes, a straightforward low-level installation can be suitable for DIY, but working at height is the main safety consideration. Complex roofs, poor access, damaged fascia and difficult drainage arrangements are better assessed by a competent professional.
What tools do I need to install a Rain Gutter?
Most installations require a tape measure, pencil, spirit level, string line, suitable saw, drill/driver, screwdrivers, appropriate fixings, ladder or access equipment and basic protective equipment.
How much slope should a Rain Gutter have?
The required slope varies by gutter system. Manufacturer specifications should be followed rather than applying one universal measurement. Different UK systems publish different recommended gradients.
Why is my Rain Gutter overflowing?
Possible causes include blocked outlets, incorrect fall, sagging gutter sections, insufficient capacity, poorly positioned outlets or heavy rainfall exceeding the system’s design capacity. Check where the overflow begins before deciding on a repair.
How often should gutters be cleaned in the UK?
Inspect them regularly, particularly after autumn leaf fall and heavy storms. Properties beneath mature trees may need considerably more frequent attention than homes with clear rooflines.
Should gutters slope towards the downpipe?
Generally, yes. UK Approved Document H says gutters should be laid with any fall towards the nearest outlet. The precise gradient should follow the manufacturer’s requirements.
When should I replace rather than repair a gutter?
Replacement is more appropriate when damage is widespread, multiple joints repeatedly leak, sections are badly cracked or corroded, or the supporting fascia has deteriorated. An isolated leak or loose bracket may only require repair.
Do gutter guards eliminate the need for cleaning?
No. Gutter guards can reduce the amount of leaves and larger debris entering a gutter, but they don’t make the system maintenance-free. Fine debris and moss can still accumulate around the guard or outlet.
Where should a downpipe discharge?
The discharge should connect to an appropriate drainage arrangement. UK Building Regulations give priority to adequate infiltration systems such as a suitable soakaway where reasonably practicable, followed by a watercourse and then a sewer where the earlier options aren’t reasonably practicable.
When should I hire a professional?
Consider professional help for high or difficult-to-access roofs, complicated drainage, damaged structural supports, work close to electrical hazards, shared drainage arrangements or any installation where you cannot work safely at height.
What Happens If the Downpipe Is in the Wrong Place?
A poorly positioned downpipe can leave a long gutter run carrying too much water towards one outlet or force water to travel an awkward route.
The solution isn’t always simply moving the downpipe.
The roof area being drained, rainfall intensity, gutter capacity, outlet configuration and drainage destination all matter.
For larger or more complicated roofs, use the relevant design guidance and manufacturer’s sizing information rather than guessing.